Set Up Custom Labels for Margin-Based Campaign Splitting
Custom labels let you split Google Performance Max campaigns by product margin, so you can bid more aggressively on high-margin products and spend less on low-margin ones. WooCommerce has no native margin field, which means you need to add one before WP Product Feed Manager can include it in your feed.
Why Custom Labels Matter for PMax
Google Performance Max treats all your products as one group unless you split them. By assigning [custom_label_0] values, you give Google a signal to place products into separate asset groups or campaigns. That lets you set different ROAS targets and budgets per margin tier, instead of chasing an average across products with very different profit profiles.
Step 1: Add Margin Data to Your WooCommerce Products
WooCommerce has no built-in field for margin or purchase price. You have two options.
Option A: Add a custom field manually
This is the fastest approach if you do not want to install an additional plugin.
- Open a product in WooCommerce via “Products” in the WordPress dashboard.
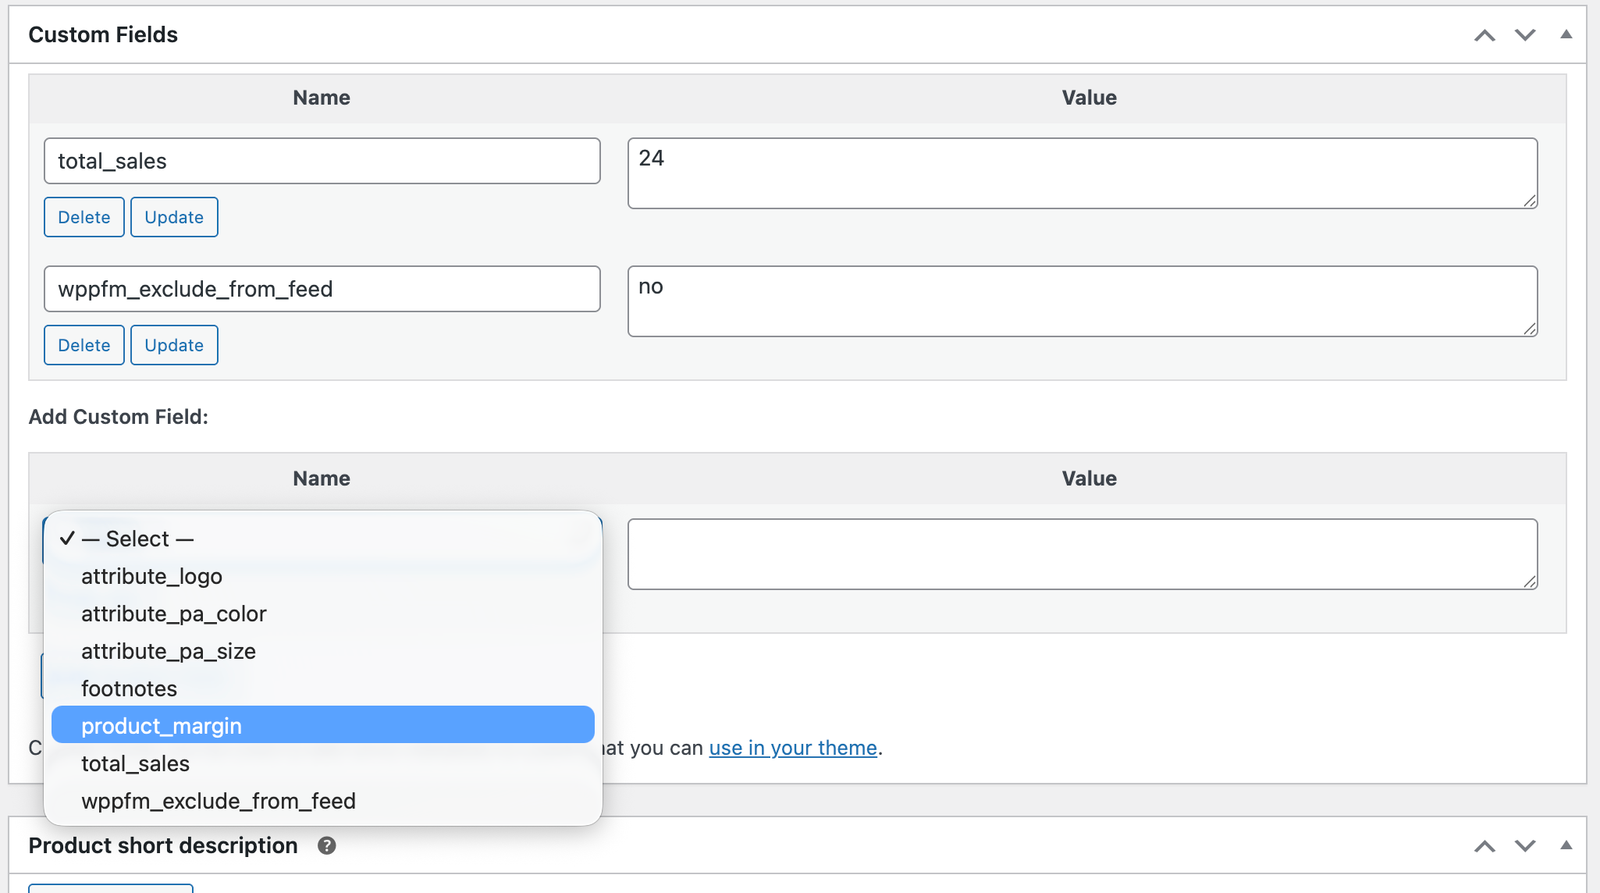
- Scroll to the “Custom Fields” section at the bottom of the product page. (If you do not see it, click “Screen Options” in the top-right corner and check the “Custom Fields” box.)
- Click “Add Custom Field” and enter the name: margin_band
- Enter one of the following values: Low, Medium, or High — based on this product’s margin.
- Click “Update” to save the product.
Repeat this for each product. For larger catalogs, use WooCommerce’s built-in CSV import (“Products > Import”) to populate the field in bulk.
Important: Use consistent values (Low, Medium, High) across all products. Inconsistent spelling or casing will break your campaign filters in Google Ads.
Option B: Use a Cost of Goods plugin
If you use a plugin like WPFactory’s “Cost of Goods for WooCommerce,” the purchase price is stored in the _purchase_price field per product.
WP Product Feed Manager does not calculate margins automatically from _purchase_price. You still need to populate margin_band yourself. Use the purchase price as a reference to assign each product to a tier:
- Margin above 40% → High
- Margin between 20% and 40% → Medium
- Margin below 20% → Low
Then add the margin_band custom field as described in Option A.
Step 2: Map the Field to custom_label_0 in WP Product Feed Manager
Once margin_band is populated on your products, map it to the [custom_label_0] feed attribute.
- Go to WP Product Feed Manager in your WordPress dashboard.
- Open the feed you send to Google.
- Go to the “Feed Fields” tab (sometimes labeled “Attributes” depending on your version).
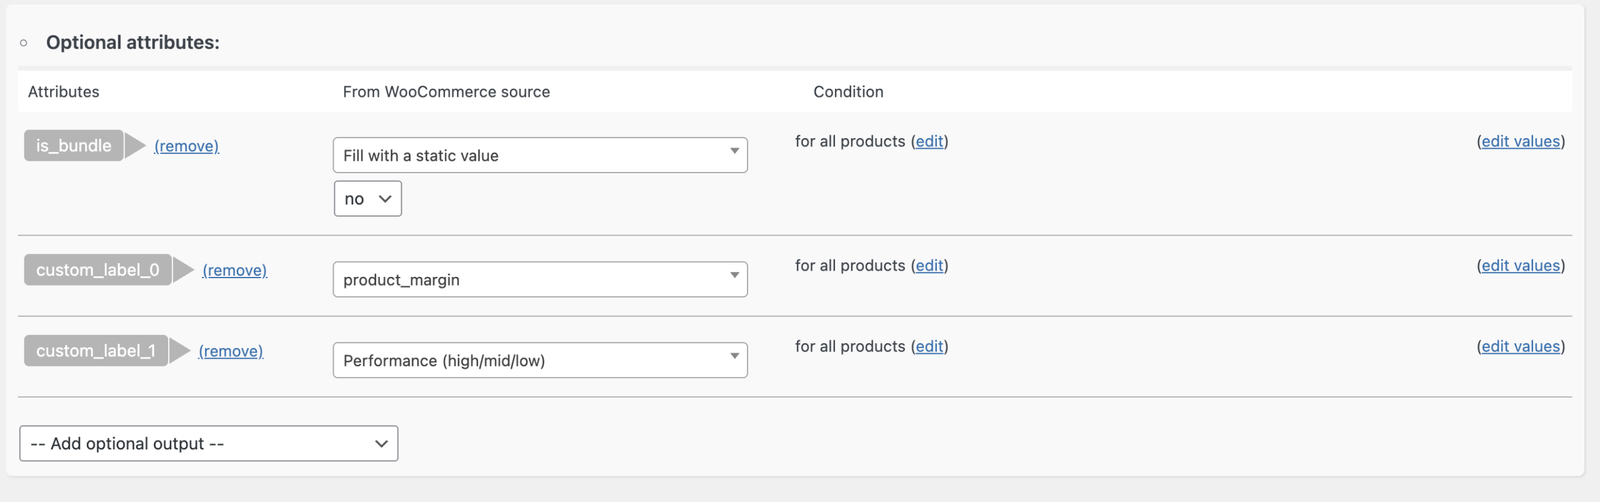
- Find the row for [custom_label_0].
- Click the “Source” dropdown in that row.
- Select “Custom Field” as the source type.
- Enter the exact field name in the text field: margin_band
- Save the feed and regenerate it.
To verify the output, open the feed URL in your browser and search for . You should see Low, Medium, or High for the relevant products.
Step 3: Split Your PMax Campaigns by Margin Band in Google Ads
After Google processes your updated feed (this typically takes up to 24 hours), you can split your campaigns.
- Open Google Ads and navigate to your Performance Max campaign.
- Click “Asset groups” in the left navigation.
- Create a new asset group for each margin tier, for example “High Margin Products.”
- Inside each asset group, go to “Listing groups.”
- Click “Subdivide” and choose “Custom label 0” as the filter.
- Select the matching value: High, Medium, or Low.
- Set a separate ROAS target or budget for each asset group.
You now have separate asset groups per margin tier. Bid aggressively on high-margin products and set a more conservative target on low-margin ones.
The Other Four Label Slots
Google Shopping gives you five custom label fields: custom_label_0 through custom_label_4. You do not need to use all of them at once. Here is a proven structure to build toward:
| Field | Purpose | Example values |
|---|---|---|
| custom_label_0 | Margin band | Low / Medium / High |
| custom_label_1 | Seasonality | Evergreen / Seasonal / Holiday |
| custom_label_2 | Inventory velocity | Fast Mover / Slow Mover |
| custom_label_3 | Price tier | Budget / Mid-range / Premium |
| custom_label_4 | Test group | Test / Control |
Start with custom_label_0 only. Add the others once your campaigns are stable and you are ready for further segmentation.
What to Do Next
Open your feed in WP Product Feed Manager, map margin_band to [custom_label_0], and regenerate the feed. Once Google has processed the update, split your asset groups by margin band in Google Ads.
Once margin labels are in place, you can take segmentation further by combining them with WP Product Feed Manager’s built-in performance data. See Combine Margin and Performance Labels for Advanced PMax Segmentation to learn how.